Quickstart: MFA on Windows RDP in ~10 minutes
The bare-minimum path from a fresh Windows host to “RDP users need MFA.” Four clicks-and-paste steps in the GUI, no JSON, no PowerShell.
Before you start
Section titled “Before you start”You need:
- A Windows host (Server 2019 / 2022 / 2025 or Windows 10 / 11 Pro, x64), with local admin rights and RDP already enabled.
- A test user with a phone number in their AD
mobileattribute, E.164 format (e.g.+46701234567). - A Mideye Client ID and Client Secret: generate them at https://portal.prod.mideye.com.
- The Mideye+ app on the test user’s phone.
1. Install
Section titled “1. Install”Download mideye-credential-provider.msi from the downloads page and run it as administrator (Welcome → License → Install → Finish). It lays down the credential-provider DLLs and MideyeProviderConfig.exe. Nothing changes about how Windows logon behaves until you finish step 4: Mideye is inactive after install.
2. Paste Client ID and Client Secret
Section titled “2. Paste Client ID and Client Secret”Open C:\Program Files\Mideye\MideyeProviderConfig.exe. On the General tab, leave Deployment Mode on Cloud, paste your Client ID and Client Secret, then click Test Connection.

You should see API: OAuth ready in the status bar at the top of the window.
3. Add yourself as a Break-Glass account
Section titled “3. Add yourself as a Break-Glass account”On the Break Glass tab click + Add User and pick your current admin account (local SAM or AD domain). Break-Glass accounts always skip MFA, they’re the recovery path if something goes wrong. Mideye refuses to activate without at least one.
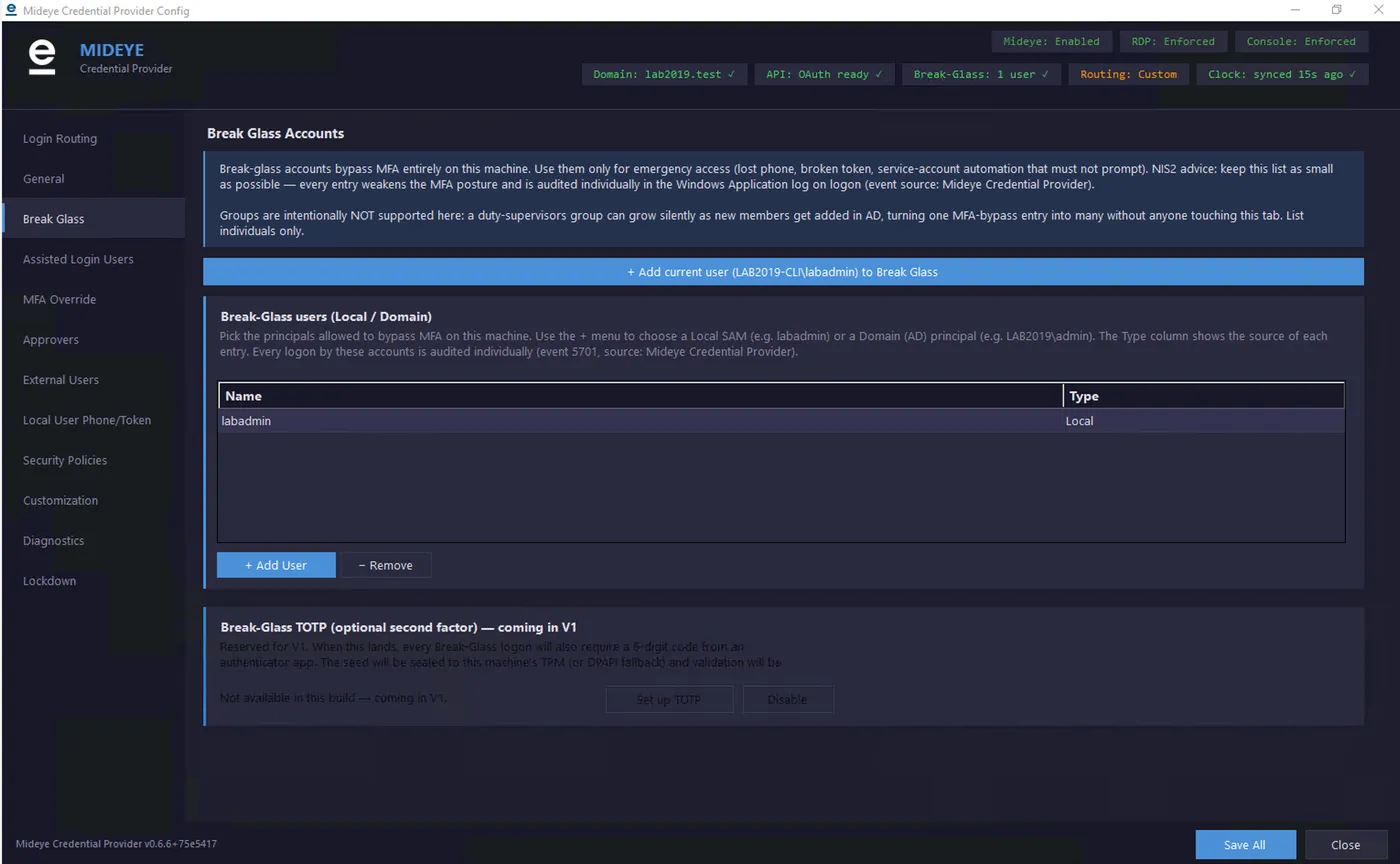
Click Save All in the bottom-right.
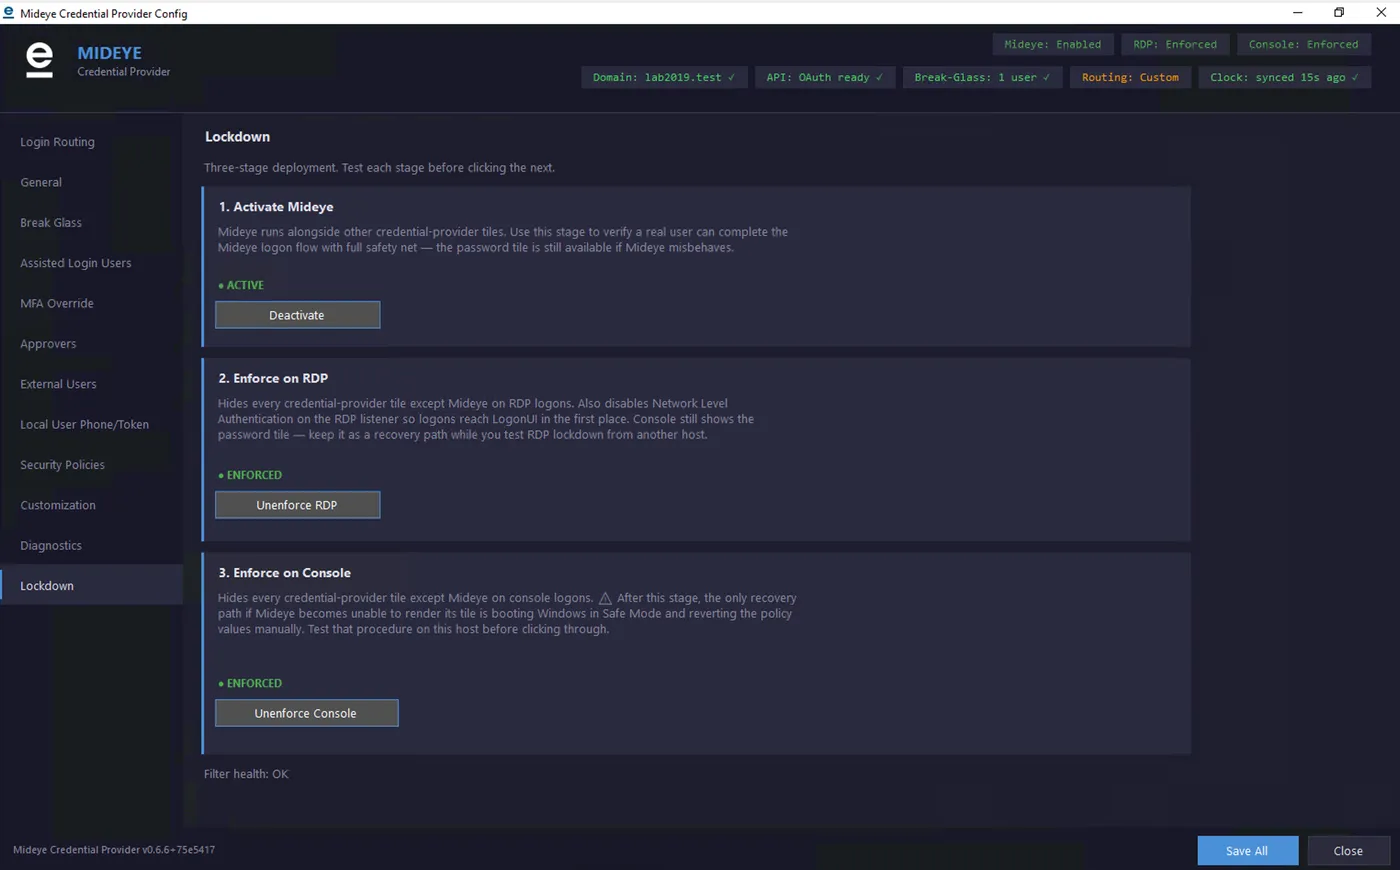
4. Activate and enforce on RDP
Section titled “4. Activate and enforce on RDP”On the Lockdown tab:
- Click Activate (Stage 1). The Mideye tile now appears on the logon screen alongside the regular password tile. You can still log in either way, verify that the Mideye flow works before locking anything down.
- RDP into the host once as your test user, accept the Touch push on their phone, and confirm Windows lets them through.
- Click Enforce on RDP (Stage 2). Every other credential-provider tile is now hidden on RDP and Network Level Authentication is disabled on the RDP listener so logons reach the Mideye tile. The console still shows the password tile as a recovery path.
Done. Any user permitted to RDP into this host who has a phone number in their AD mobile attribute is now prompted for MFA on every RDP logon.
Leave Stage 3, Enforce on Console, off until you’ve run Stage 2 in production for a while. Once enforced on the console there’s no password-tile fallback.
What’s next
Section titled “What’s next”Before going live, configure a Break-Glass account that does not depend on the Mideye backend being reachable, it is the only path back in if the API is unreachable. Beyond that, the configuration tool exposes a Login Routing schedule (per-hour MFA / Assisted / Deny), per-user MFA Override pinning, Assisted Login approver rosters (local, domain, and external phone-only approvers), and customisable user-facing prompts. Explore those tabs in MideyeProviderConfig.exe once the basic RDP-MFA flow is working.