Microsoft Entra ID (Azure AD) Integration Guide
Overview
Section titled “Overview”Mideye Server 5.5+ supports Microsoft Entra ID (formerly Azure Active Directory) as a user repository. Users authenticate against Entra ID while Mideye provides the MFA second factor.
Requirements:
- Mideye Server 5.5 or later
- Azure/Entra ID tenant with Global Administrator access
- App registration with Microsoft Graph API permissions
Starting from release 5.5 it is now possible to use Azure Active Directory (AAD) as a user repository for Mideye Server. A secure connection between the Mideye Server and Entra ID is established using Microsoft Graph. Complete the following steps to create a “App registration” in Entra ID.
App Registration
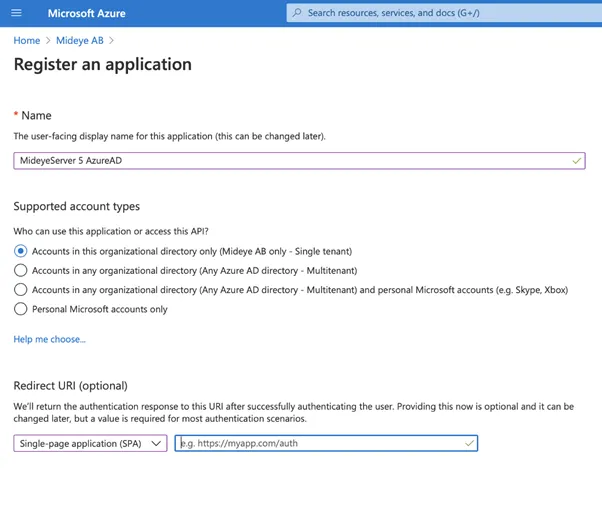
Section titled “App Registration”- Navigate to portal.azure.com.
- Sign in as a global administrator and select “Azure Active Directory”.
- Click “App Registrations” and select “New registration”.
- Give the application a friendly name and select what user repository to be allowed to use the application.
- Select “Single-page application (SPA)” and leave the url blank. Complete the registration by clicking “Register”.
App Configuration
Section titled “App Configuration”Once the app is registered in Azure Active Directory it must be configured. Click the created app and complete the following steps:
- Navigate to “Certificates & secrets”
- Click “New client secret” and give the client secret a friendly name. Click “Add”
- Make note of the shared secret value. It will be needed later when configuring the Mideye Server.
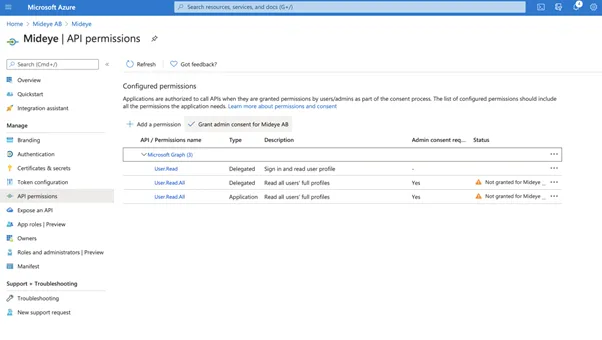
- Navigate to API permissions and click “Add a permission”
- Select Microsoft Graph and Application permissions. Navigate to “User” and select “User.Read.All”. Click “Add permissions”
- (Optional). To be able to retrieve more information about a specific user, such as group membership a delegated permission must be added. Click “Add Permissions”. Select “Microsoft Graph” followed by “Delegated permissions”. Navigate to user and select “User.Read.All”. Click “Add permissions”
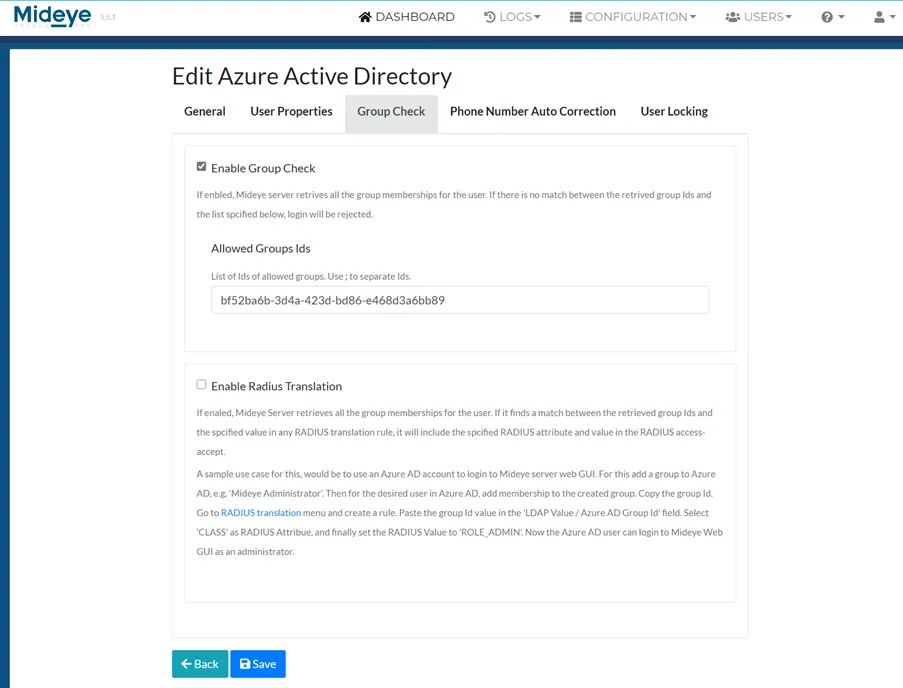
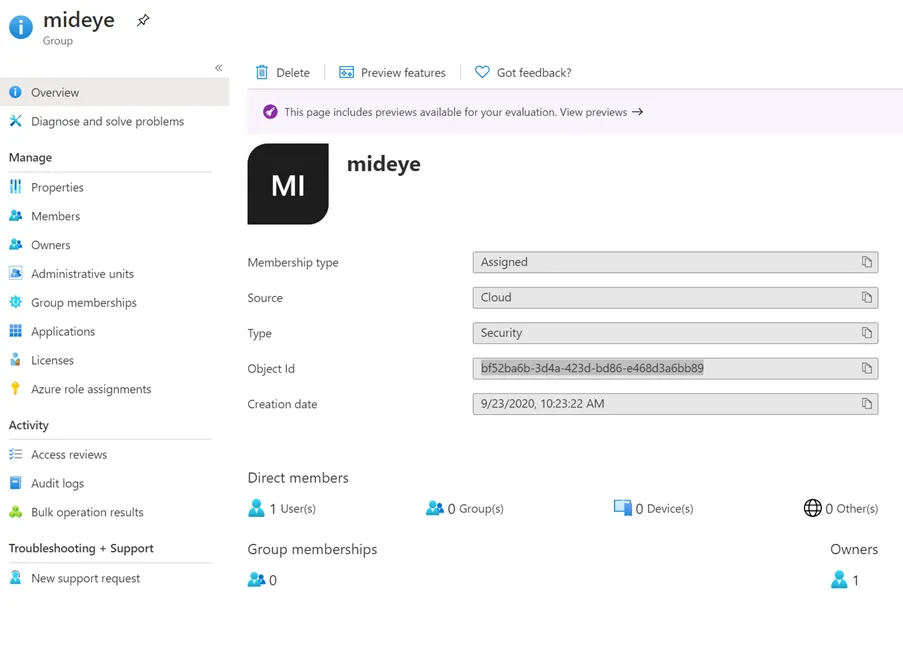
 Allows the app to list groups, and to read their properties and all group memberships on behalf of the signed-in user. Also allows the app to read calendar, conversations, files, and other group content for all groups the signed-in user can access.7. Last step is to grant admin consent for the app by clicking “Grant admin consent for app”.

Click “Yes” to grant permissions to the app. Navigate to “Overview” and take note of the following ID´s. These will be used later when configuring the Mideye Server.
- Application ID
- Object ID
Mideye Server configuration
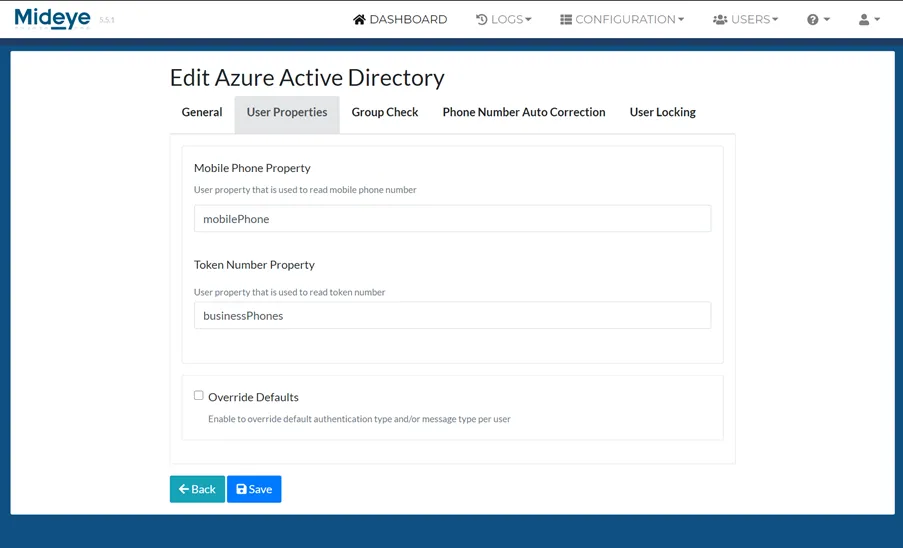
Section titled “Mideye Server configuration”Login to Mideye Server 5 as an administrator and navigate to “Configuration” followed by “Azure Active Directory”. Click “Create Azure Active Directory”. Add a Display name and paste the Tenant ID, Client ID and Client secret saved from previous steps.
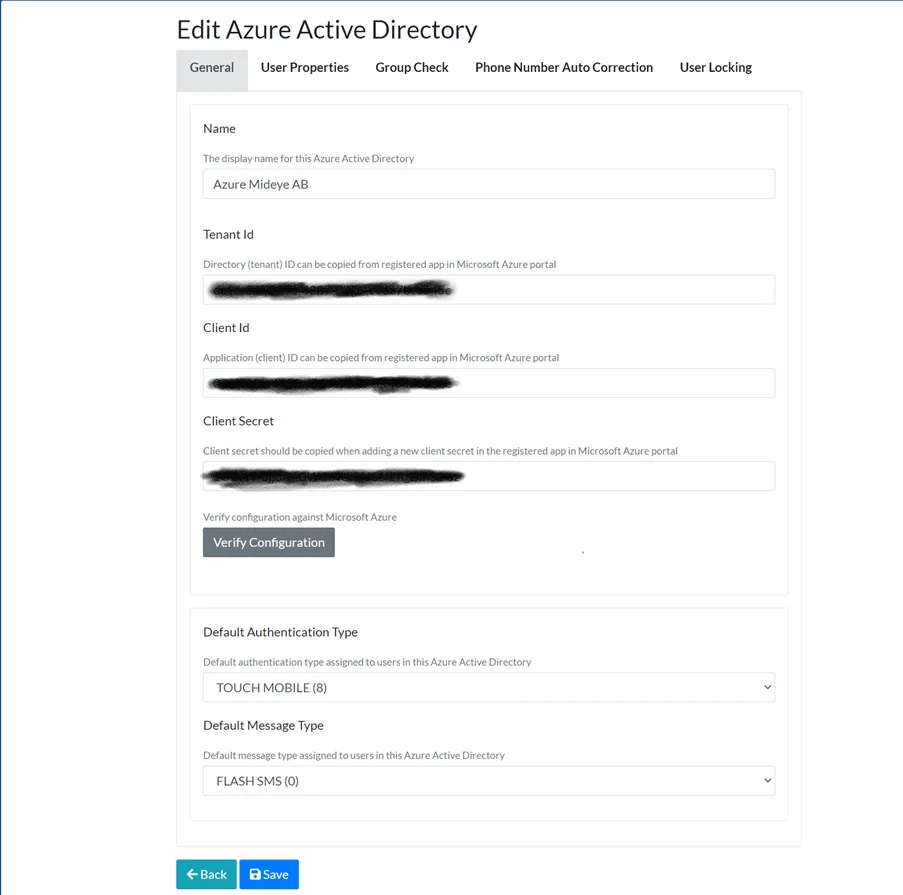 Enter a friendly name followed by Tenant ID, Client ID and Client secret. Click “Verify Connection” followed by the UPN of a user that should be reachable in the tenant.
Click “Save”. To add a Entra ID profile to a RADIUS client, see