Windows VPN MFA Setup with Mideye (RRAS & NPS)
This guide describes how to integrate Mideye two-factor authentication (Touch Accept) with the built-in Windows VPN using Routing and Remote Access Service (RRAS) and Network Policy Server (NPS).
| Component | Versions |
|---|---|
| Windows Server (RRAS, NPS) | 2022 / 2019 / 2016 |
| Mideye Server | 5.x / 6.x |
Architecture
Section titled “Architecture”Prerequisites
Section titled “Prerequisites”- Mideye Server 5 or later with UDP port 1812 open from the VPN server.
- The VPN server defined as a RADIUS client in Mideye Server.
- Mideye+ app installed and activated on end-user devices. See the Mideye+ guide.
- A configured Network Policy Server (NPS).
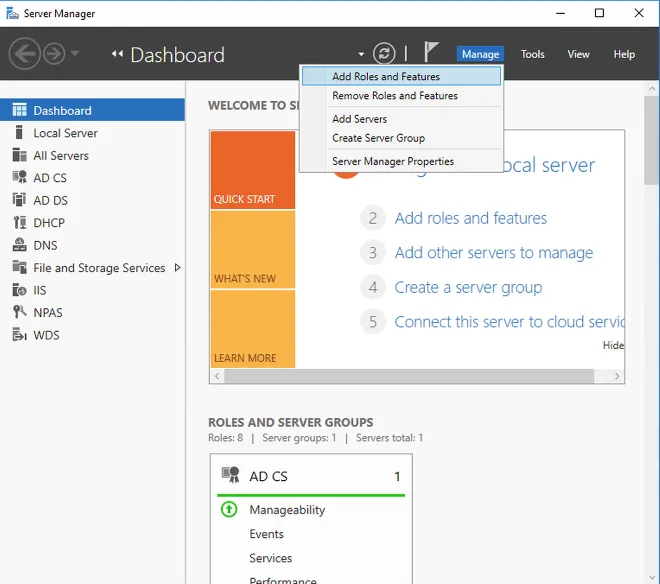
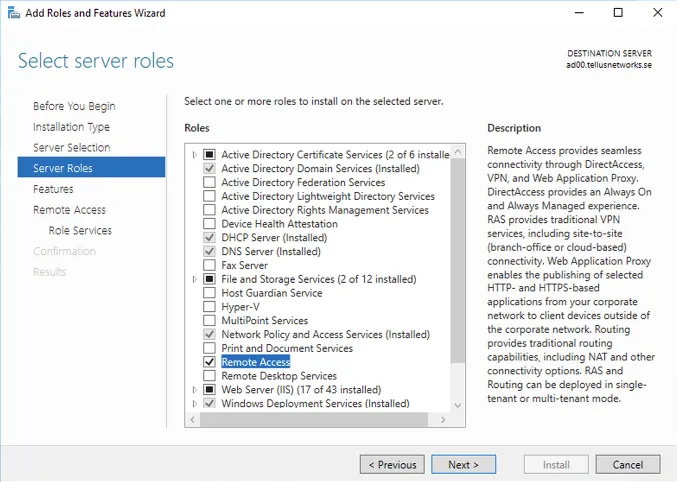
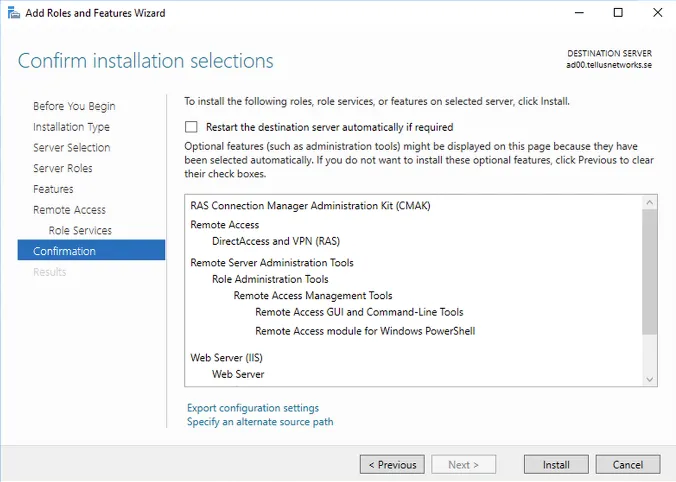
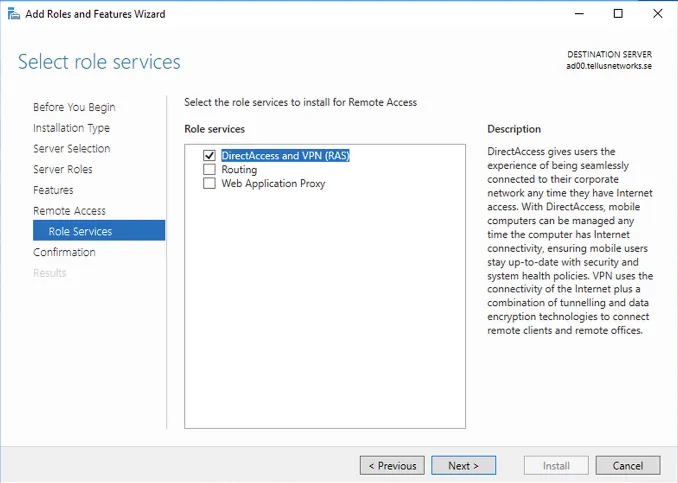
1. Install Remote Access Server
Section titled “1. Install Remote Access Server”-
Open Server Manager → Add Roles and Features.
-
Select Remote Access → DirectAccess and VPN (RAS).
-
Complete the installation and open the configuration wizard.
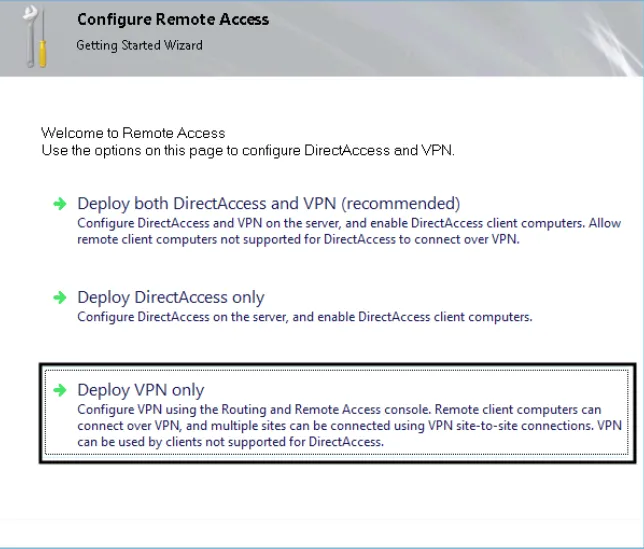
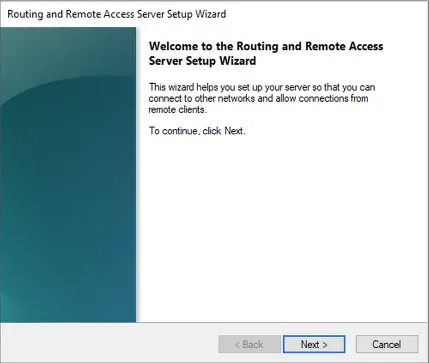
2. Configure the Remote Access server
Section titled “2. Configure the Remote Access server”This example configures a VPN server using EAP-MS-CHAPv2 with Mideye two-factor authentication.
-
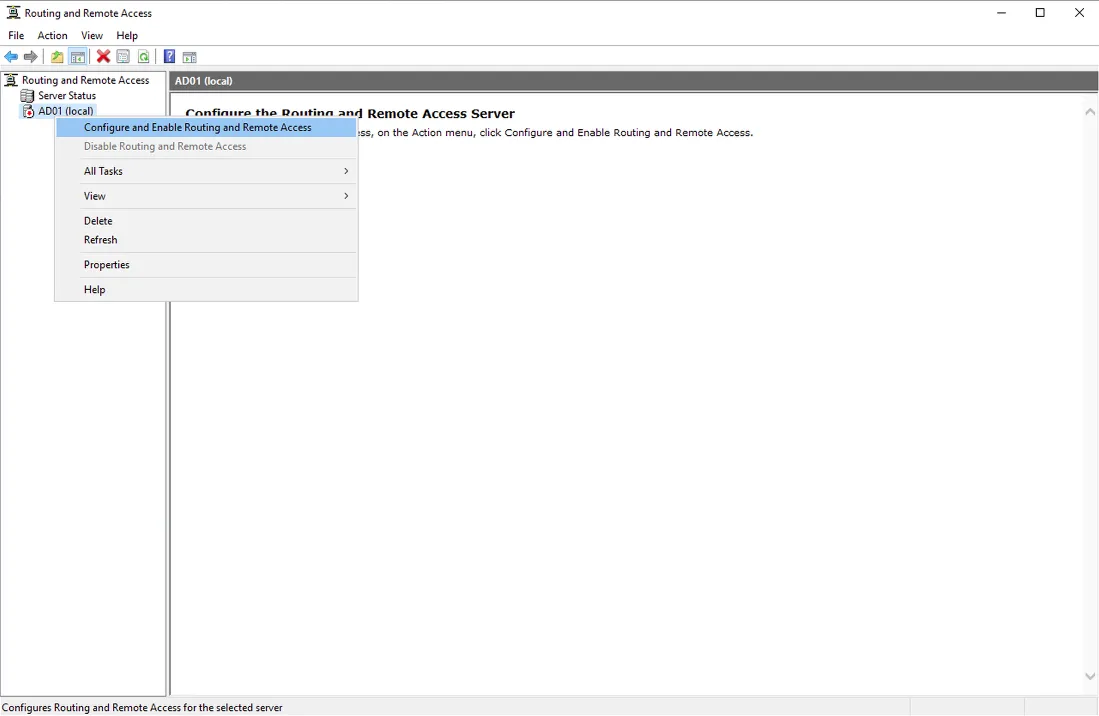
Open the RRAS Management Console.
-
Right-click the server → Configure and Enable Routing and Remote Access.
-
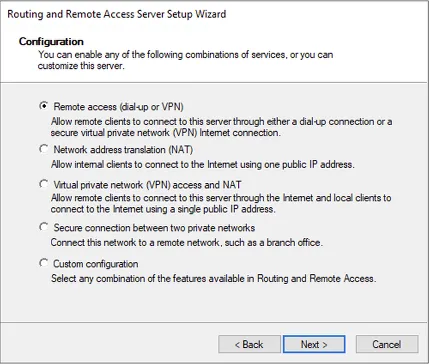
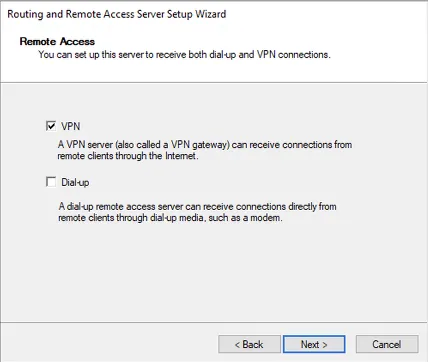
Select Remote access (dial-up or VPN) → Next.
-
Select VPN → Next.
-
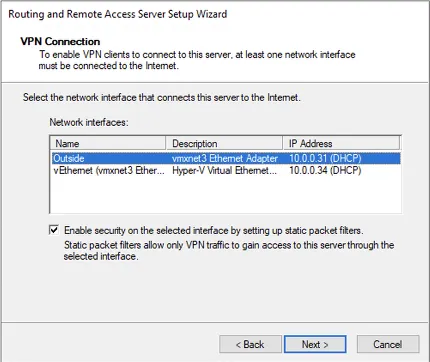
Choose the network interface for remote access VPN.
-
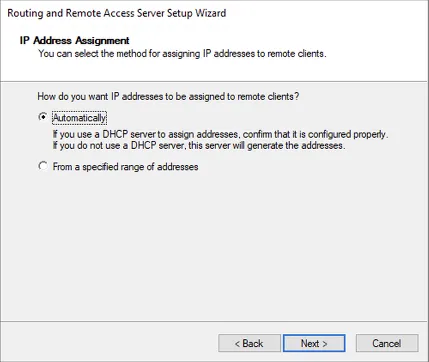
Select DHCP or a static IP pool for VPN clients.
-
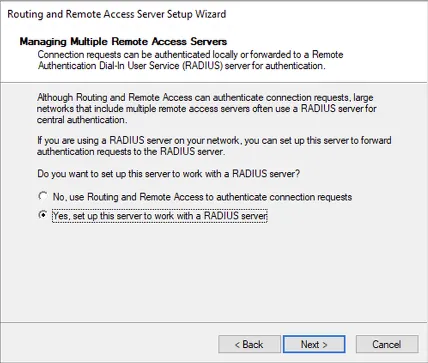
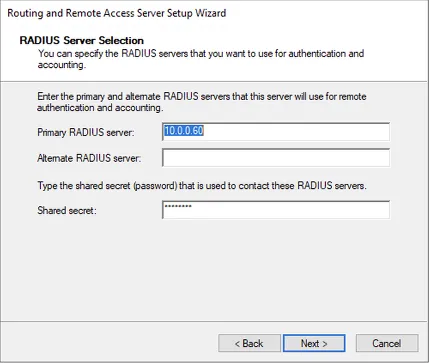
Select Yes, set up this server to work with a RADIUS server.
-
Enter the Mideye Server IP and shared secret.
-
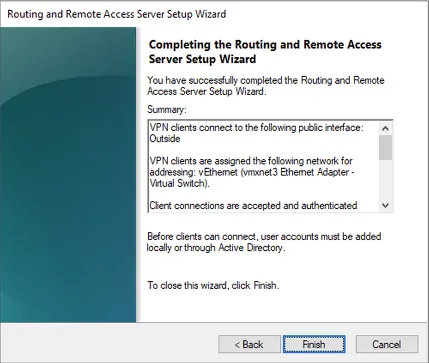
Complete the configuration.
3. Configure RADIUS settings
Section titled “3. Configure RADIUS settings”-
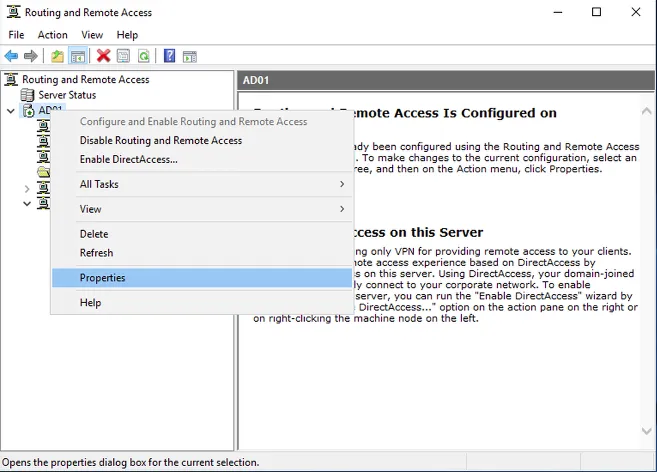
Open the RRAS Management Console → right-click the server → Properties.
-
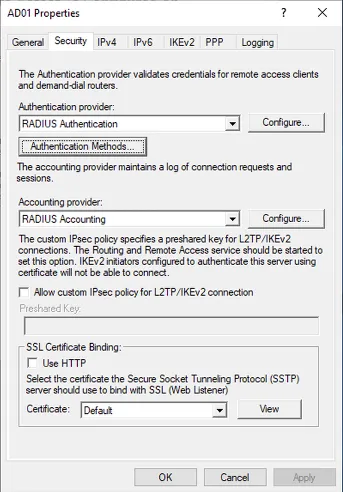
Click Configure next to RADIUS Authentication.

-
Select the RADIUS server → click Edit.
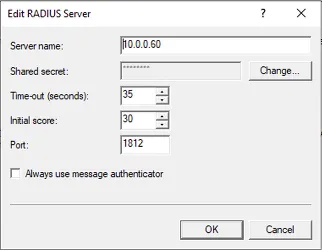
-
Set the timeout to 35 seconds and verify the port matches Mideye Server (default UDP 1812).
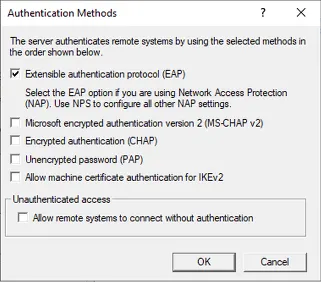
-
Click Authentication Methods and remove all methods except Extensible Authentication Protocol (EAP).
4. Configure Mideye Server
Section titled “4. Configure Mideye Server”-
Open the Mideye WebGUI → Configuration → RADIUS Clients → Create New.
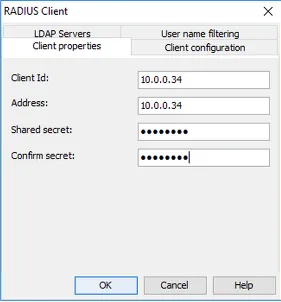
-
Enter the VPN server IP and the same shared secret configured above. Navigate to Username Filtering.
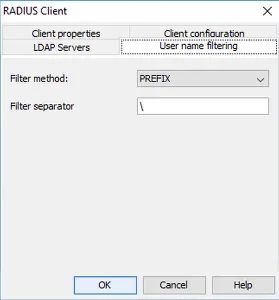
-
Select PREFIX as the filter method and enter
\in the filter separator field. This removes thedomain\prefix when users connect with “use windows credentials”.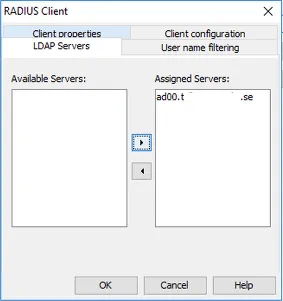
-
Select the LDAP server for authentication.
-
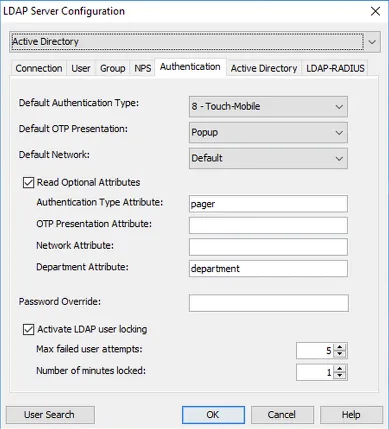
Navigate to the LDAP Server tab → modify the LDAP server used by this RADIUS client.
-
Change the authentication type to 8 Touch-Mobile. This only affects users with the Mideye+ app installed.
-
Click OK → Close to restart services.
5. Configure NPS
Section titled “5. Configure NPS”-
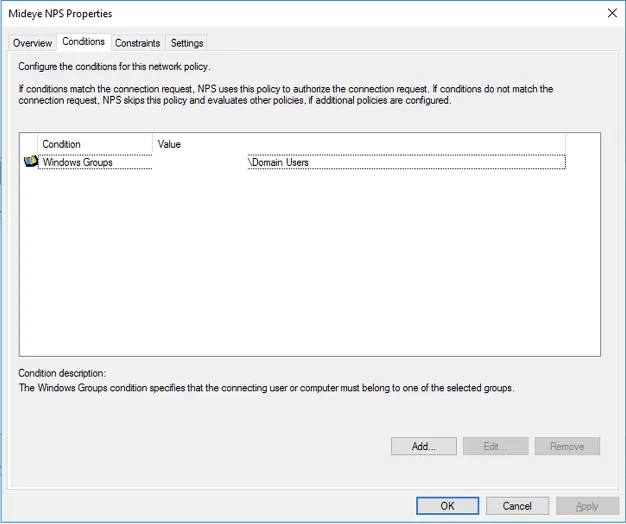
Open Network Policy Server and navigate to Policies → Network Policies.
-
Select the policy used by Mideye → Properties.
-
On the Conditions tab, add a Windows group with users allowed to connect via Mideye VPN.
-
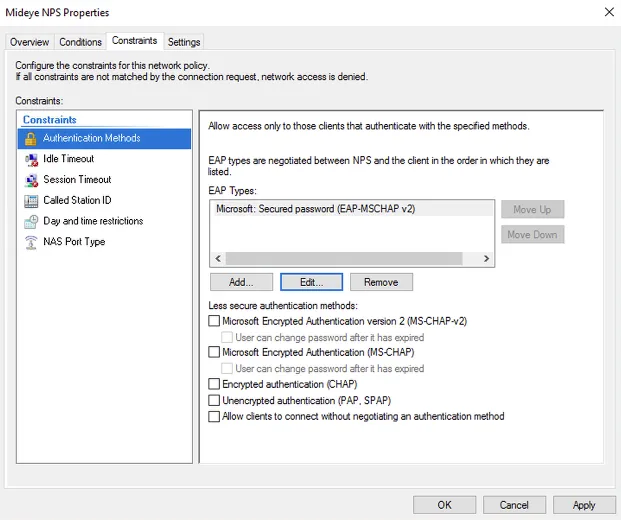
On the Constraints tab, add Microsoft: Secured password (EAP-MSCHAPv2).
-
Click OK.
For full NPS configuration, see the Network Policy Servers guide.
6. Set up VPN connection for end users
Section titled “6. Set up VPN connection for end users”This configuration can be deployed via GPO for domain-joined computers. The following shows manual setup for a single computer.
-
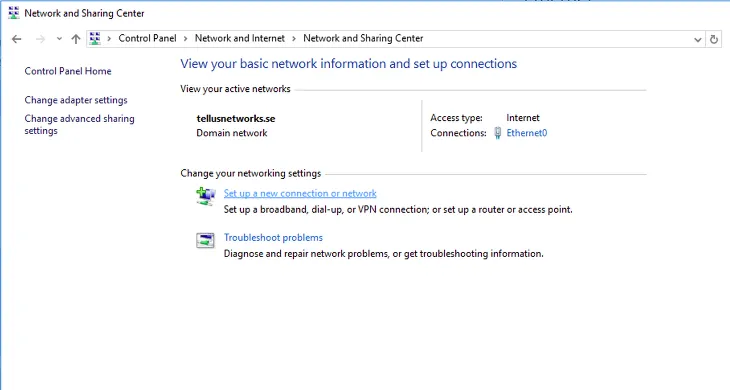
Open Network and Sharing Center → Set up a new connection or network.
-
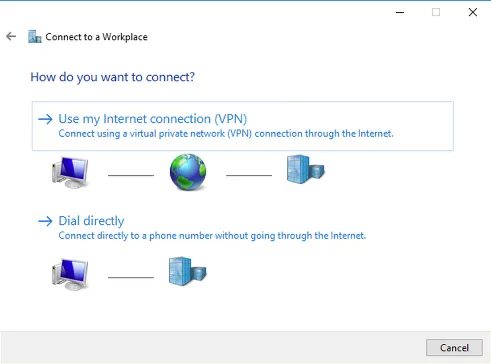
Select Connect to a workplace.

-
Select Use my Internet connection (VPN).
-
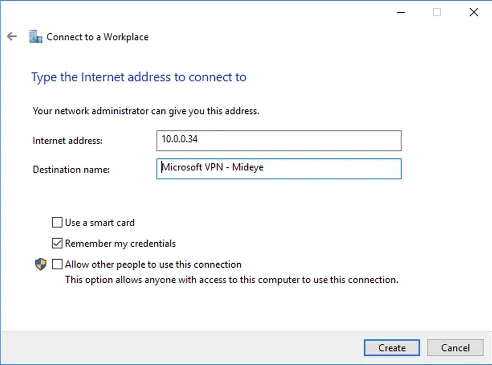
Enter the VPN server IP and select Remember my credentials → Create.
-
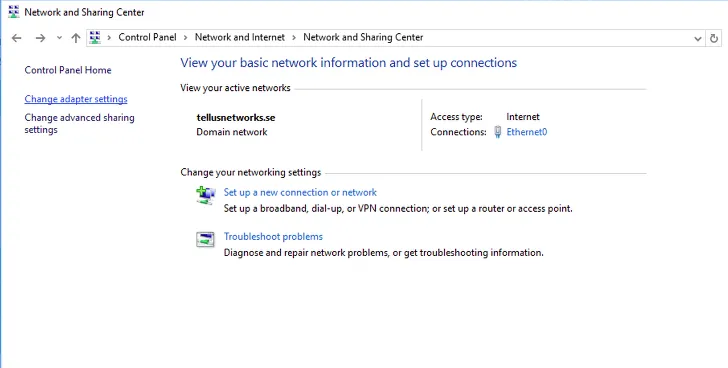
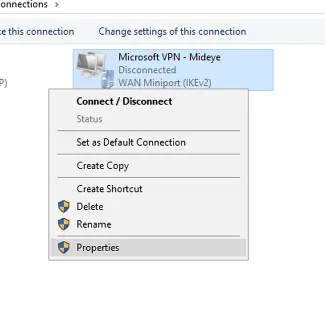
Open Network and Sharing Center → Change adapter settings.
-
Right-click the VPN connection → Properties.
-
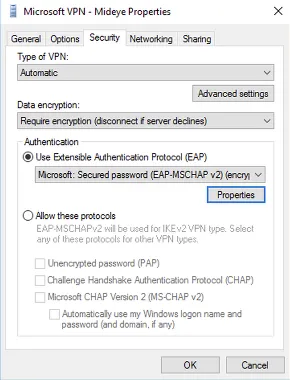
On the Security tab, select Require encryption (disconnect if server declines) and set authentication to Microsoft: Secured Password (EAP-MSCHAPv2) (encryption enabled).
-
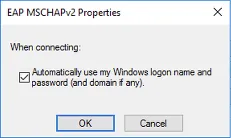
Check Automatically use my Windows logon name and password (and domain if any).
The VPN connection is now protected with Mideye two-factor authentication.
Troubleshooting
Section titled “Troubleshooting”| Symptom | Check |
|---|---|
| VPN connection times out | Verify RADIUS timeout is at least 35 seconds on both RRAS and NPS. |
| No push notification received | Verify the Mideye+ app is installed and activated. Check authentication type is set to Touch-Mobile on the LDAP server in Mideye. |
| Authentication rejected by NPS | Verify the user is in the Windows group specified in the NPS network policy. Check shared secrets match between RRAS, NPS, and Mideye. |
| ”Connection failed” after correct OTP | Verify EAP-MSCHAPv2 is the only authentication method in RRAS. Other methods may conflict. |
| Domain prefix in username | Configure PREFIX username filtering with \ separator in the Mideye RADIUS client. |
| No RADIUS traffic on Mideye Server | Verify UDP 1812 is open between the VPN server and Mideye Server. Check radius-messages.log. |
Related links
Section titled “Related links”Mideye documentation
Section titled “Mideye documentation”- RADIUS Clients — add the VPN server as a RADIUS client
- Network Policy Servers (NPS) — configure NPS for Mideye
- Mideye+ — Touch Accept app setup
- RADIUS Integrations — authentication flows and supported auth types
- Windows Integrations — overview of all Windows integration options
Official Microsoft documentation
Section titled “Official Microsoft documentation”- Routing and Remote Access (RRAS) — VPN server deployment
- NPS Overview — Network Policy Server documentation
- EAP-MSCHAPv2 — EAP authentication methods